Installation Instructions for the Secure Hood Lock
Tools Required:
Electric
Drill
½
inch or 5/8 inches drill bits (for metal)
Open
end, box, or adjustable wrench
Round
file (optional, but good to have to clean up any burrs or to size up a hole)
Safety
glasses (again optional but good to have)
Center
Punch and Hammer (not required but it can help to keep the drill bit from
Wandering)
Note: Installation was performed on
a 1995 Jeep Wrangler Sahara equipped with air conditioning. More room between
the grill and radiator is available with non-ac equipped models, however you
should have plenty of room available between the ac condenser and the grill.
Step 1:
Raise the
hood and secure it with the prop in the open position. You will be drilling a
hole in the front edge of the hood so make sure you hold the hood securely when
you apply pressure on the drill.
Drape an old sheet, towel, or drop
cloth over the engine compartment. This will catch the small bits of metal
thrown off by the drill.
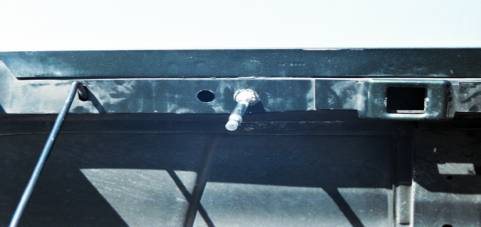
Diagram 1
Step 2:
Locate the
placement of the hole in the hood. This is where the locking pin will be
mounted. Before making the hole, an important consideration will be getting
access to the retaining nut. (see Diagram
1). Note the distance
from the factory hole on the edge of the hood.
Also, try
to line up the locking pin so that it falls between the grill opening (see Diagram 2). Try to mount the locking pin as far forward as possible.
This will provide more clearance to mount the lock between the radiator/AC
condenser and the grill.
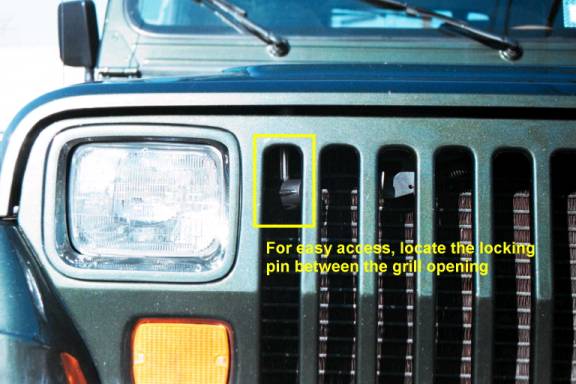
Diagram 2
Step 3:
After you
are satisfied with the location, mark the spot where you will drill. You can
use a center punch and hammer (this is not required but it can help to keep the
drill bit from wandering)
Before you drill, I would recommend you wear safety
glasses. In most cases (unless you remove the hood from the vehicle) you will be
drilling in an overhead position. Safety glasses will help prevent bits of
metal shavings from falling into your eyes!!!
Slowly,
begin drilling the hole. You do not want to drill too quickly! Slow and careful
drilling will produce a cleaner hole and will also reduce the chances of damage
to the upper part of the hood when the drill bit cuts through the metal.
Step 4:
Mount the
locking pin to the hood using the supplied nut. This could be a bit tricky
depending on where you located the hole. A trick I uses was to tape the bolt to
the wrench and slide it through the large opening where the hood latch is
located. Secure the locking pin tightly in place. See Diagram 1.
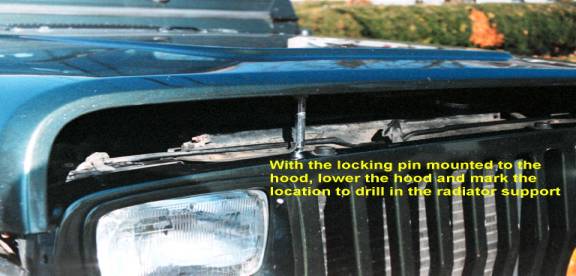
Step 5:
After you
secure the shackle, gently close the hood and mark where the locking pin comes
in contact with the radiator support. Mark this location and then raise the
hood. Drill a 5/8 inch hole in this location. See Diagram 3 and Diagram 4
Before drilling, make sure there are no wires,
hoses, or other lines of any type under the radiator support where you will be
drilling the hole!!!
After you drill the hole, clean up
the hole with a round file.
Diagram
3
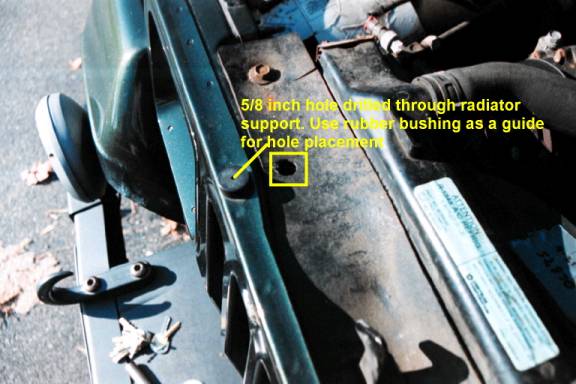
Diagram
4
Step 6:
Test the
installation by closing the hood. The hood should close as before and the
locking pin should not bind on the radiator support. If you find that the
locking bar is catching, you can file the hole a little larger. See Diagram 5
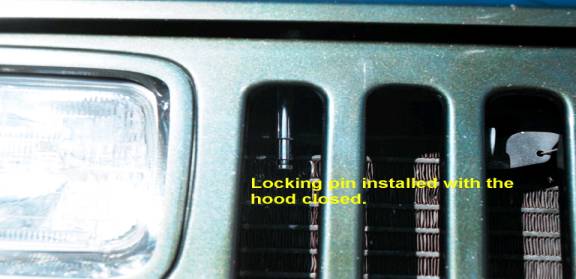
Diagram 5
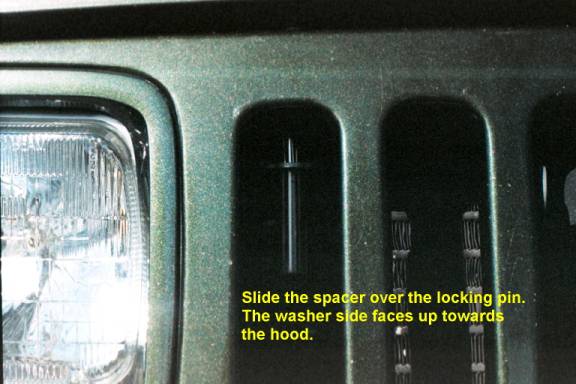
Step 7:
After
you are satisfied with the installation of the locking pin, close the hood and
install
the supplied spacer assembly (see Diagram
6). The spacer
assembly is
installed
on the locking pin accessed from between the grill assembly. The
purpose of
the space assembly is two fold:
1)
The
spacer assembly will prevent the partial opening of the hood. Without the
spacer, the
hood can be raised to the point where the lock cylinder will meet the radiator
support. The spacer assembly is a sleeve designed to take up this space.
2) The
spacer assembly turns freely on the locking pin. This will make it more
difficult for someone to try and grab the locking pin and turn it with a pair
of pliers.
***Note: The spacer assembly
supplied should, in most cases, fit as supplied. However in those
instances where the spacer is too long, it can be trimmed with a hacksaw or
similar tool. It is OK if the spacer is a little short. The main point is that
the lock cylinder be able to mount and close properly.
Diagram
6
Step 8:
After the
spacer assembly has been installed, you can now install the lock
cylinder.
The lock cylinder is designed to swivel 360 degrees. This will allow the lock
cylinder to be installed at an angle if the clearance between the radiator/ ac
condenser is a little tight. Remember, ALWAYS INSTALL THE CYLINDER WITH THE KEY
OPENING FACING OUTWARD TOWARD THE GRILL! YOU MUST BE ABLE TO ACCESS THE OPENING
TO INSERT THE KEY TO REMOVE THE LOCK!!!
That it, you are finished!!! After
the installation is complete, try and remove the assembly a few times to get
comfortable with its function.
See the care and maintenance
section for additional information.
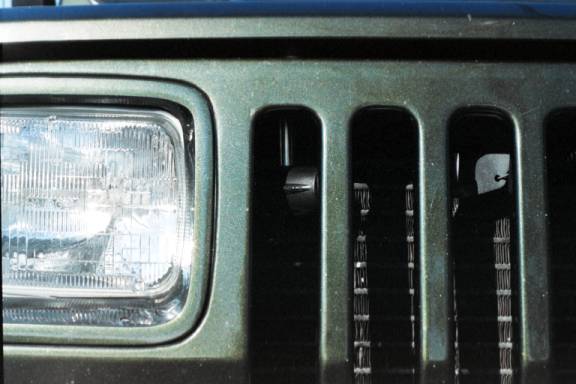
Diagram 7